
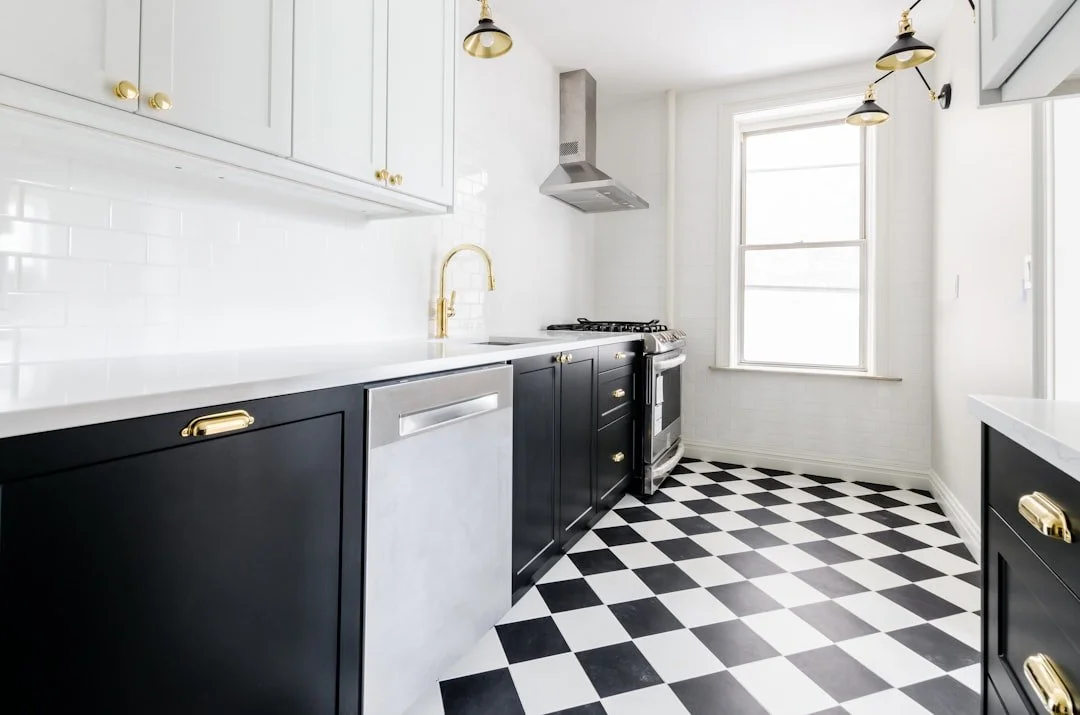
DIY Tile Installation in the Kitchen: Mistakes to Avoid for a Flawless Finish

PAGE
By PAGE Editor
Kitchen renovations are exciting, but when it comes to tiling, even the smallest mistake can lead to costly repairs. Whether you're revamping a backsplash or retiling the floor, achieving a professional-looking result requires more than just patience—it demands precision and planning. If you're tackling kitchen tile installations yourself, understanding common pitfalls can save you time, money, and frustration.
Let’s explore the most frequent DIY tiling mistakes and how to ensure a seamless, long-lasting installation.
1. Skipping Proper Surface Preparation
One of the most overlooked steps in tiling is preparing the surface correctly. Tiles need a clean, dry, and level surface to adhere properly. Installing tiles over dirt, grease, or an uneven surface can lead to poor adhesion and an uneven finish.
How to Avoid This:
Ensure the surface is free of dust, grease, and debris before starting.
Use a levelling compound for uneven floors or backsplashes.
If tiling over old tiles, lightly sand the surface and apply a bonding primer.
2. Choosing the Wrong Type of Tile
Not all tiles are suited for every kitchen space. A tile that looks great in a showroom might not be durable enough for high-traffic areas or moisture-prone spots.
How to Avoid This:
For kitchen floors, opt for porcelain or natural stone tiles, which are durable and slip-resistant.
For backsplashes, ceramic and glass tiles offer both style and ease of maintenance.
Avoid using wall tiles on floors—they lack the necessary strength.
3. Neglecting Tile Layout Planning
Jumping straight into installation without a proper layout plan can lead to awkward cuts and unbalanced patterns.
How to Avoid This:
Dry-lay tiles before applying adhesive to visualize spacing and cuts.
Start from the centre of the surface and work outward to ensure symmetry.
Use tile spacers to maintain even grout lines.
4. Using the Wrong Adhesive or Not Applying It Correctly
Different tiles require different adhesives, and improper application can lead to loose tiles or weak bonds.
How to Avoid This:
Choose adhesive based on the type of tile and surface (mortar for stone and large tiles, mastic for small ceramic tiles).
Spread adhesive evenly using a notched trowel, ensuring full tile coverage.
Avoid applying too much at once—only spread as much as you can tile within 15 minutes.
5. Failing to Use a Tile Spacer
Without proper spacing, grout lines can become uneven, making the installation look unprofessional.
How to Avoid This:
Always use tile spacers to maintain consistent gaps.
Check alignment frequently and adjust before the adhesive sets.
Once tiles are set, remove spacers before grouting.
6. Rushing the Grouting Process
Grouting might seem straightforward, but doing it too soon or using the wrong technique can cause cracks, discolouration, or weak bonds.
How to Avoid This:
Wait at least 24 hours after installing tiles before applying grout.
Use a rubber float to spread grout evenly, pressing it into the gaps.
Wipe off excess grout with a damp sponge before it dries completely.
7. Ignoring Grout Sealing and Maintenance
Grout is porous and can easily absorb moisture and stains, leading to discolouration and mould growth.
How to Avoid This:
Use a high-quality, stain-resistant grout.
Apply a grout sealer to protect against moisture and spills.
Regularly clean grout with a pH-neutral cleaner to prevent buildup.
8. Not Accounting for Tile Expansion and Contraction
Temperature changes and humidity cause tiles to expand and contract. Without proper spacing, tiles can crack or lift over time.
How to Avoid This:
Leave a small expansion gap (about ⅛ inch) along the edges where tiles meet walls or cabinets.
Use flexible caulking in corners instead of grout to accommodate movement.
Avoid placing tiles too tightly against each other.
Final Thoughts
A successful DIY tile installation requires patience, planning, and attention to detail. By avoiding these common mistakes, you can achieve a stunning and durable result that enhances your kitchen’s aesthetic and functionality. If you're ever in doubt, consulting a professional can save you from costly repairs down the line. Whether you're tackling a backsplash or a full floor project, precision is key to ensuring your tiles stay beautiful for years to come.
HOW DO YOU FEEL ABOUT FASHION?
COMMENT OR TAKE OUR PAGE READER SURVEY
Featured


UK investors are placing greater emphasis on risk management and long-term growth as financial markets continue to reflect changing interest-rate expectations, uneven economic performance, geopolitical uncertainty, and greater variation between asset classes.