Transform Your Signature: Remove Backgrounds in Just a Few Clicks
By PAGE Editor
Have you ever needed to remove the background from a signature but found it hard to do? For whatsoever reason like serving digital documents, professional branding, or personal projects, a messy background will interfere with the importance of your signature.
This article will extend your step-by-step lessons, whereby you will be able to remove unwanted backgrounds so that your signature is clean and sharp. You don't have to be a tech expert; by the end of this guide, you'll feel confident using tools like Photoshop and insMind to change your signature's background in a few seconds.
So, let'sget started.
Part 1. Why Remove Signature Background from Image?
Before getting straight to how to remove signature background, it's essential to first understand why there is a need to remove signature background from image.
Well, there are several reasons:
Clarity and Focus: A clear signature, not obscured by any background, enables the viewer to focus on the signature. This may be important in a professional world where often the first impressions are the most important.
Professional Outlook: This removes the background of your signature, making it professional for adding polish one needs to look even more professional-looking in business communication, branding, and legal documents.
Versatile Use: A background-free signature can easily fit into various documents, presentations, or marketing materials. You can place it on any background without clashing colors or patterns.
Branding Coherence: When one considers a signature as part of a brand, coherence needs to be attained across all media. A transparent signature does just that for maintaining brand identity.
Easy to Adjust: In case of an empty signature, you easily can change its size, color, style, and so on for such context without much worry about how the background sets or presents it.
Now let's learn how to get rid of background by using a signature background remover.
Part 2. How to Remove Signature Background in Photoshop?
If you want your signature to look professional and clean, removing its background is a crucial step. A clear signature enhances your brand's image and makes your documents look polished.
Here is how you can remove signature background using Photoshop:
Open your signature image in Photoshop by clicking on "File" in the top menu and selecting "Open." Choose the image file from your computer.
Select the Magic Wand tool from the toolbar. Click on the background area around your signature to select it. If necessary, adjust the tolerance level in the options bar to include all background areas.
If the Magic Wand doesn't give you the desired selection, use the Pen tool to create a path around the signature. Right-click on the path and select "Make Selection."
Refine the selection as needed using the Lasso tool or Quick Selection tool to ensure all parts of the signature are included and the background is excluded.
Press the Delete key on your keyboard to remove the selected background, leaving a transparent area around your signature. Alternatively, use the Layer Mask tool to hide the background instead of deleting it.
Save your final image in a format that supports transparency, such as PNG, by clicking on "File," selecting "Save As," and choosing PNG from the format options.
Part 3. How to Remove Signature Background in insMind?
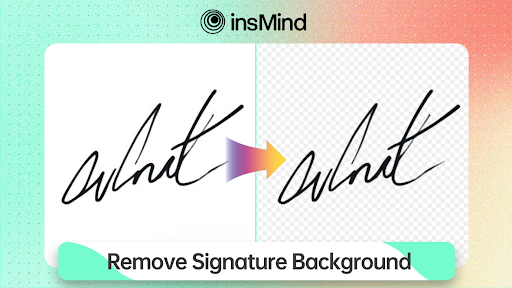
If you're looking for an easy way to remove the background from your signature, insMind is an excellent choice. This signature background remover tool will enable you to transform your hand-written signature into a neat-looking professional image with a transparent background, which will look great on your digital documents and in your branding.
With an easy-to-use interface and the support of powerful AI, insMind simplifies what has been time-consuming by using photo editing tools.
To get started with insMind, follow these steps:
Step #1. Access the Tool Page:
Open your web browser and go to insMind's signature background remover.
Step #2. Upload Your Photo:
Now click the upload button to select an image. Immediately a file dialog pops up; go the photo of your signature and select it. The upload will start immediately, and you will begin to see a preview of your signature appear on screen.
Step #3. Remove Background from Your Image:
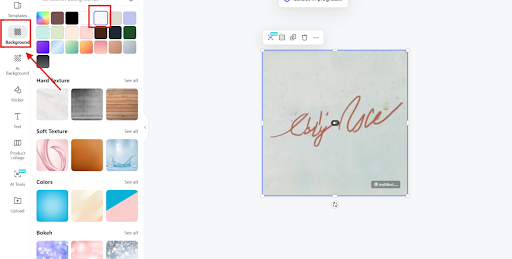
Once the image is uploaded, the tool will start analyzing. In the left panel, select the transparent background option. Once you select the option, the tool will automatically remove the signature background. The AI will work towards isolating your signature and removing all the background elements from it.
Step #4. Download:
Once the background is removed, you will have a clear preview of your signature on a transparent background. If you feel that's okay, just click Download, and it automatically saves your image as a PNG file because it supports transparency, which can then be easily used in various documents and presentations.
Part 4. Tips for Achieving the Best Results
Here are some helpful tips that you might want to consider to ensure that the background of your signature is removed with the best results:
Choose High-Quality Images:
Always use a high-resolution image of your signature. This will give the tool a clear, crisp photo to detect the edges of your signature and usually results in a much cleaner output. Critically, blurry or pixelated images produce rough edges and look unprofessional.
Adjust Image Settings:
See if the tool has options like brightness, contrast, or color level settings before starting the removal process. This may help make your signature more visible and therefore more distinguishable to the AI from the background.
Check Edges After Removal:
Once the background is removed, you will have to blow up to view the edges of your signature. Be on the lookout for leftover backgrounds or edges that appear jagged. For anything that isn't perfect, most tools will allow manual modification, so utilize those features further to hone your signature.
Save in the Right Format:
Once you are comfortable with the final image, you will need to save it in a file format that allows for transparency. This is important so when you place the signature on other documents, it will keep it clean. File types such as JPEG do not have this feature, bringing in an ugly white background. So, you will have to save it in .PNG format to maintain transparency.
Consider Different Backgrounds:
If you are going to use your signature on multiple documents, scan a few different backgrounds to see how this signature looks on them. This will give you an opportunity to make any necessary adjustments so that your signature really stands out every single time.
Conclusion
So that's how you can remove background from signature. Advanced tools, such as insMind, provide marvelous professional results with only a few clicks. This approach saves you much time and gives you a clean signature with polish on any document.
If you haven't tried the insMind tool yet, now is the right time! Easily remove backgrounds in one go without hassle and elevate your digital presence. Try it now on insMind and transform your signature hassle-free!
HOW DO YOU FEEL ABOUT FASHION?
COMMENT OR TAKE OUR PAGE READER SURVEY
Featured


In today’s competitive professional world, making a lasting impression goes beyond skills and expertise—it’s also about confidence and appearance.