
How to charge a mini V-mount battery?

PAGE
By PAGE Editor
A mini V-mount battery is a convenient power source for cameras and other video equipment. Its small size makes it easy to carry, while its high capacity can support longer shooting sessions. But before using one on a camera rig, you need to know how to charge it correctly.
The charging process is usually simple. You need the right charger, a suitable power source, and a safe place to charge the battery. This guide walks you through each step, from checking the battery before charging to storing it after use.
Step 1: Check the battery before charging
Start by checking the battery and its charging specifications. Look at the label, user manual, or product information to find the recommended charging method and input power.
Check the battery for any visible damage. Look at the housing, charging port, and contacts. Do not charge the battery if it is cracked, swollen, leaking, or unusually hot.
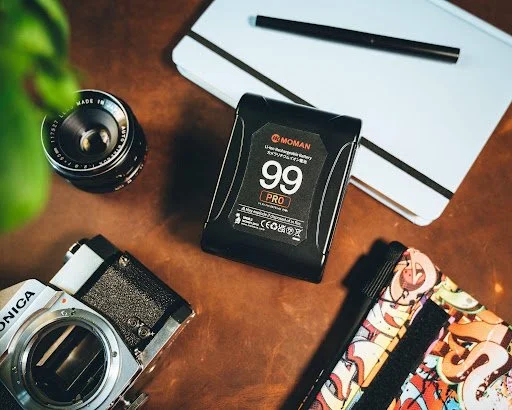
You should also check the battery capacity. For example, a 99Wh mini v-mount battery may need a different charging time from a smaller battery. Capacity alone does not determine charging speed, so also check the supported charging input.
Before connecting anything, make sure the battery is at a normal temperature and placed on a stable surface.
Step 2: Choose the correct charger
After checking the battery, choose a charger that matches its charging requirements.
Some V-mount batteries use a dedicated charger. Others support USB-C charging. A dedicated charger can be useful for regular studio work, while USB-C charging can be more convenient when traveling.
Do not choose a charger just because its plug fits the battery. The charger must also provide the correct voltage and power.
If the battery supports USB-C charging, check the recommended USB-C input before choosing a power adapter. A low-power adapter may charge the battery slowly, while an incompatible adapter may not charge it at all.
Using the charger recommended by the manufacturer is the safest option.
Step 3: Connect the battery to the charger
Once you have the correct charger, connect the mini V mount battery.
If you are using a dedicated V-mount charger, place the battery onto the charger according to the charger's instructions. Make sure the contacts are aligned correctly and the battery is firmly connected.
If you are using USB-C, connect the USB-C cable to the battery's charging input. Then connect the other end to a compatible power adapter.
After connecting the battery, check the charging indicator. Many batteries use LED lights or a digital display to show the charging status.
If there is no charging indication, do not immediately assume the battery is broken. Check the cable, adapter, and connection first.
Step 4: Start charging and monitor the battery
After the battery is connected, let it charge on a stable surface with good airflow.
Keep the battery away from direct sunlight, water, and sources of heat. Do not cover it with clothing, bags, or other objects while charging.
During charging, watch the battery indicator if one is available. Some batteries show the remaining charge as a percentage. Others use different LED patterns to indicate charging and full power.
The charging time depends on several factors. These include battery capacity, charging power, battery temperature, and battery condition.
For this reason, there is no fixed charging time for every battery. Check the manufacturer's specifications for the expected charging time.
Step 5: Check whether the battery is fully charged
When the battery reaches full charge, its indicator may stop flashing or show a full battery symbol. The exact display depends on the battery model.
Do not rely only on charging time to decide whether the battery is full. The indicator is a better way to check the status.
If you are preparing for a long shooting day, check the battery before leaving. A full battery gives you more available runtime and reduces the chance of changing batteries during an important scene.
It is also useful to prepare a spare battery for longer production days.
Step 6: Disconnect the battery after charging
Once the battery is fully charged, disconnect it from the charger.
For a dedicated charger, remove the battery carefully from the charging contacts. For USB-C charging, disconnect the cable from the battery and then from the power adapter.
Avoid pulling the cable by force. Hold the connector when removing it.
After disconnecting the battery, let it return to a normal temperature if it feels warm. Then place it somewhere dry and safe until you are ready to use it.
Step 7: What should you do if the battery does not charge?
Sometimes a battery may not start charging. Before replacing it, check the basic connections.
First, check whether the charger is connected to a working power source. Then check the charging cable and connectors. If you are using USB-C, make sure the cable is connected to the correct charging port rather than an output port.
Next, check whether the charger meets the battery's input requirements.
If the battery still does not charge, try the charging equipment recommended by the manufacturer. Do not keep trying random chargers.
If the battery becomes very hot, smells unusual, swells, or shows other signs of damage, stop charging it and follow the manufacturer's safety instructions.
Step 8: Keep the battery in good condition
Proper charging is only one part of battery care. How you store and use the battery also affects its service life.
Keep the battery in a cool, dry place when it is not being used. Avoid leaving it in a hot car or under direct sunlight.
Do not regularly use a damaged battery. Also, keep the battery contacts clean and dry.
If you will not use the battery for a long time, follow the manufacturer's storage recommendations. Some batteries should be stored with a partial charge instead of being left completely empty.
Good storage habits can help keep the battery ready for your next shoot.
Step 9: Choose a battery with a convenient charging method
Once you understand the charging process, you can also consider charging convenience when buying a battery.
A mini V mount battery with USB-C charging can be useful for filmmakers who often move between locations. You may be able to use a compatible USB-C power adapter without carrying a separate dedicated charger.
Size is another factor. A compact battery takes up less space in a camera bag and adds less weight to a camera rig.
You should also check the battery's outputs if you plan to power other equipment. For example, a mini V-mount battery with dual D-Tap can provide power for compatible accessories.
A battery plate is another part to check when building a camera rig. Make sure the plate is compatible with the battery and provides the connections you need.
Final thoughts
Charging a mini V-mount battery does not need to be complicated. Start by checking the battery and its charging requirements. Then choose a compatible charger, connect the battery correctly, and monitor the charging process.
After the battery is full, disconnect it carefully and store it in a suitable environment. If the battery does not charge normally, check the charger, cable, and connection before continuing.
By following these steps, you can charge your battery safely and keep it ready for your next filming session.
HOW DO YOU FEEL ABOUT FASHION?
COMMENT OR TAKE OUR PAGE READER SURVEY
Featured





Jackets have always been an important part of fashion.